To install roof insulation, start by preparing the roof space: clear debris, inspect for water damage, and check ventilation. Next, choose the right insulation type based on your climate, budget, and preferences.
Measure the roof area, including skylights and vents, to calculate the required materials. Remove old insulation materials, taking care to note hidden wiring and plumbing. Install a vapour barrier, followed by insulation batts, making certain they’re not compressed or disturbed.
Add insulation to eaves, sealing gaps and joints as you go. Finally, inspect your work to verify a job well done and discover the full benefits of a properly insulated roof.
Key Takeaways
- Prepare the roof space by clearing debris, inspecting for water damage, and installing walkways or platforms for safety.
- Choose the right insulation type based on climate, budget, and preferences, and determine the necessary R-value for effective heat flow resistance.
- Measure the roof area accurately, calculate the quantity of the required material, and add a 10-15% margin for cuts and waste.
- Install a vapour barrier to prevent moisture buildup, and lay insulation batts snugly between joists without compression, securing them with a staple gun.
- Seal gaps and joints around vents, chimneys, and skylights with spray foam or caulk to prevent air leaks and ensure optimal insulation performance.
Prepare the Roof Space
Before you start installing roof insulation, it’s vital to get into the roof space and clear out any debris that may be obstructing the area. Remove old insulation, dust, and dirt to guarantee a smooth installation process.
- Check for any signs of water damage or leaks and address them before proceeding.
- Next, inspect the roof ventilation system to confirm it’s functioning correctly. Proper ventilation is essential to prevent moisture buildup and reduce the risk of mould and mildew. Check for any blockages in the vents and make sure they’re not obstructed by debris or old insulation.
- Improve space accessibility by installing walkways or platforms if necessary. This will make it easier to move around the roof space and maintain a safe working environment.
- Additionally, consider installing lighting to illuminate the area, making it easier to work in the space. By taking these steps, you’ll be well-prepared to install your roof insulation efficiently and effectively.
Choose the Right Insulation
Your roof’s insulation needs depend on various factors, including climate, budget, and personal preferences. Consider these factors when selecting the right insulation for your roof.
There are several types of insulation to choose from, including fibreglass batts, cellulose, spray foam, and reflective insulation. Each type has its benefits and drawbacks, so it’s essential to research and compare them.
Determine the insulation R-value you need, which measures the insulation’s ability to resist heat flow. The higher the R-value, the more effective the insulation. For example, if you live in a cold climate, you may need insulation with a higher R-value to keep your home warm.
Consider the following:
- Check the recommended R-value for your climate zone
- Consider the insulation’s durability and maintenance requirements
- Evaluate the cost and potential return on investment
- Think about any allergies or sensitivities you may have
Measure the Roof Area
Now that you’ve selected the right insulation for your roof, it’s time to determine how much you’ll need. Measure your roof area carefully to avoid waste and guarantee you have enough materials for the job.
Start by gathering essential measuring tools like a tape measure, ladder, and pencil. Safety should always be your top priority when measuring your roof, so make sure your ladder is securely positioned and consider enlisting a helper for added stability.
When measuring, begin at the edge of the roof and work your way inward. Take precise roof measurements by noting the length and width of each section, including any skylights, vents, or chimneys that will affect the installation process.
Be sure to measure from the top plate to the roof decking and factor in the required thickness of the insulation. For multi-layered roofs, consider taking individual measurements of each section and add up the results for the total roof area.
To get the correct calculations, don’t forget to add any overlaps between the different areas you measure.
Remove Old Insulation Materials
Removing old insulation materials is an essential step in preparing your roof for new insulation. This process helps you identify any damage or rotting wood that needs to be fixed before installing new insulation.
- Begin by wearing safety gear, including gloves, goggles, and a dust mask. Verify you have a ladder or scaffolding that’s sturdy and secure.
- Next, locate the old insulation materials, which are usually found in the attic or between the roof joists. Use a utility knife or saw to cut the insulation into manageable sections. Carefully remove the sections, taking note of any wiring, plumbing, or ductwork that may be hidden.
- When disposing of old insulation materials, consider the environmental impact. Check with your local waste management for proper disposal methods. Some materials, like fibreglass, may require special handling.
Make a list of the materials you’ve removed and the condition of the roof to help you plan for the new insulation installation. Properly dispose of the old materials, and clean the area thoroughly before proceeding with the installation process.
Install Vapour Barrier
Now that you’ve removed the old insulation materials, it’s time to install a vapour barrier to prevent moisture from entering your roof space. You’ll need to choose the right vapour barrier material for your roof type, considering factors like durability, breathability, and cost.
Before you start, make sure you understand the installation best practices to guarantee a watertight seal and peak performance.
Vapour Barrier Materials
Vapour Barrier Materials, commonly installed alongside your insulation, help reduce condensation risks by keeping the space beneath the insulation relatively dry.
They come in different vapour barrier types, such as:
- Polythene sheets (or plastic sheeting): The most common and affordable option
- Breathable membranes: Allowing for air and moisture movement, but still maintaining insulation efficiency
- Smart membranes: Dynamically adapting to humidity and temperature conditions
- Liquid-applied vapour barriers: Sprayed onto the insulation, ideal for unique roof structures
Consider your insulation material and the roof structure when selecting the best vapour barrier for your needs. Read and follow the manufacturer’s guidelines to guarantee you use the vapour barrier as intended.
Once you have the correct material, carefully handle the sheets or membranes during transportation to avoid tears and punctures. Now it’s time to proceed to install your vapour barrier effectively, minimizing wrinkles, gaps, or seams to maximize insulation efficiency and roof integrity.
Installation Best Practices
When you’re about to install your vapour barrier, consider the entire roof space to guarantee a seamless integration with your insulation.
Ensure the area is clear of debris, and inspect the roof for any gaps or cracks that need sealing.
Wear safety gear, including gloves, safety glasses, and a dust mask, to protect yourself from potential hazards.
Tool Recommendations
- A utility knife or scissors for cutting the vapour barrier
- A staple gun or tape for securing the barrier
- A ladder or scaffolding for safe access to the roof space
Installation Steps
- Unroll the vapour barrier, ensuring it’s large enough to cover the entire roof space.
- Cut the size barrier, leaving a 150mm overlap at the seams.
- Secure the barrier to the roof frame using staples or tape.
- Ensure all seams and edges are tightly sealed to prevent moisture entry.
- Inspect the installation for any gaps or weaknesses, making adjustments as needed.
Lay Insulation Batts
As you begin installing your roof insulation, focus on the attic floor where the insulation batts will go. This step is vital in guaranteeing your home stays warm in the winter and cool in the summer. When choosing batter types, consider factors like climate, budget, and desired R-value.
| Insulation Type | R-Value | Cost-Effectiveness |
|---|---|---|
| Fiberglass | R-2.9 to R-3.8 | Medium to High |
| Cellulose | R-3.2 to R-3.8 | High |
| Mineral Wool | R-3.0 to R-4.0 | Medium |
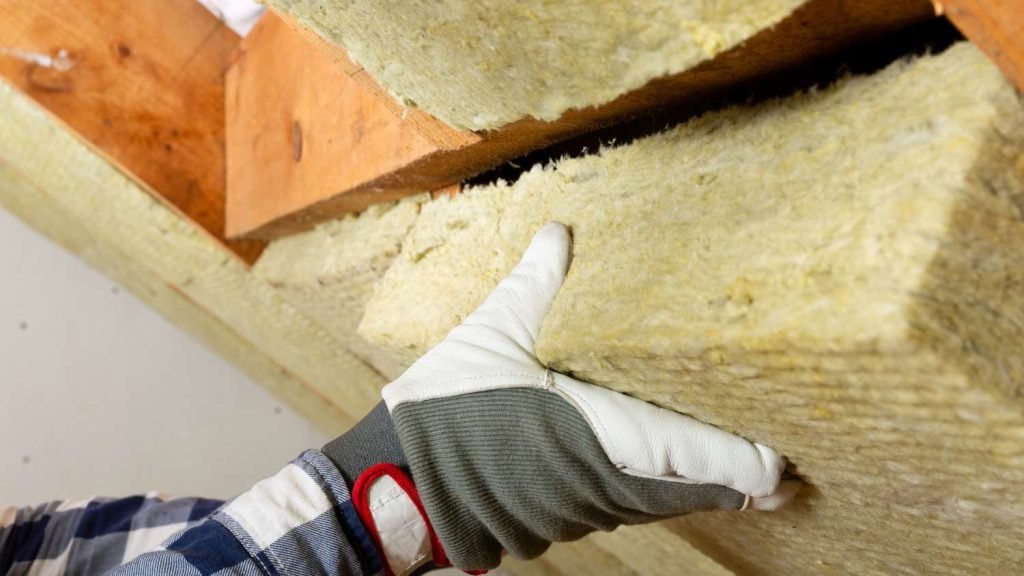
To lay insulation batts, start by cutting them to fit between the joists. Wear protective gear, including gloves, a mask, and safety glasses. Guarantee the batts fit snugly, but not too tightly, as this can compress the insulation and reduce its effectiveness.
Use a staple gun to secure the batts to the joists. When installing insulation batts, it’s essential to follow proper installation techniques to maximize their performance. For example, guarantee the batts are not compressed or disturbed during installation, and avoid gaps or overlaps between them.
Add Insulation to Eaves
Now that you’ve laid the insulation batts, it’s time to focus on the eaves the areas where the roof meets the walls.
To add insulation to these spaces, you’ll need to work with existing gaps, calculate the quantity of the required material, and identify any blockages that might prevent a snug fit. Start by inspecting the eaves for gaps and obstructions, and make a note of the measurements to guarantee you have enough insulation materials on hand.
Working With Existing Gaps
Before adding insulation to the rest of your roof, you’ll need to tackle the gaps at the eaves, which can let warm air escape and allow cold air to seep in. These gaps can be found where the roof meets the walls, around vents, and near chimneys.
To address these gaps, focus on gap-filling and preventing thermal bridging.
Identify and Fill Gaps
Start by inspecting your roof’s eaves for gaps and cracks. Use a flashlight to illuminate dark areas, and check for signs of air leakage, such as dust or dirt accumulation.
Once you’ve identified the gaps, use a suitable gap-filling material, like expanding foam or caulk, to seal them. Apply the material according to the manufacturer’s instructions, and make sure to fill the gaps.
Prevent Thermal Bridging
Thermal bridging occurs when a material with high thermal conductivity, like metal, connects the warm interior of your home to the cold exterior. To prevent this, use a thermal break, such as a foam gasket or a thermal barrier, to separate the metal from the surrounding insulation.
Calculating Required Materials Quantity
You’re ready to add insulation to the eaves, but first, you need to determine how much material you’ll require. This step is vital to guarantee you have enough insulation to cover the entire area without wasting resources.
- Start by measuring the length, width, and depth of your eaves space. You can use a tape measure or consult your roof plans for accurate dimensions.
- Next, consider the insulation types you’ll be using. Different materials have varying thicknesses and coverage rates, so it’s important to factor these in when calculating your needs. For example, fibreglass batts, cellulose, and spray foam have different material costs and coverage rates.
- Make a list of the materials you’ll require, including the insulation itself, any necessary facings or membranes, and fasteners.
- Calculate the total area of your eaves space and multiply it by the coverage rate of your chosen insulation. Don’t forget to add a 10-15% margin to account for cuts and waste.
Identifying Blockages to Fit
Identifying Blockages to Fit
You’ve determined the materials you’ll need for the job, so it’s time to focus on preparing the eave space for insulation. Check the area for blockage sources that can prevent you from fitting the insulation correctly. Common blockages include existing insulation, wiring, pipes, and structural elements like rafters and trusses.
Identify the insulation types you’ll be using, blanket insulation, spray foam, or rigid foam boards – to determine the best approach for your specific situation.
Assess the eave space to see if any of these blockages exist. If you find existing insulation, consider whether it’s worth removing or if you can work around it. If there are wiring or pipes in the way, plan a route for the insulation that avoids these obstacles.
Make note of any structural elements that could interfere with the insulation, and adjust your plan accordingly. Take photos or make sketches of the eave space to help you visualize the layout and plan your approach. This will save you time and frustration in the long run. Clear the area of any debris or obstructions before proceeding with the installation.
Seal Gaps and Joints
Sealing gaps and joints is an essential step in ensuring your roof insulation performs effectively. It’s important to prevent air leaks, which can considerably reduce the insulation’s R-value and increase your energy bills. You’ll want to inspect your roof for gaps and joints around vents, chimneys, skylights, and other roof penetrations.
- Identify areas where air leaks are most likely to occur, such as where the roof meets the wall or around windows.
- Use a sealant like spray foam or caulk to fill gaps and joints, ensuring a tight seal.
- Pay attention to thermal bridging, where warm air can escape through gaps in the insulation, and address these areas accordingly.
When sealing gaps and joints, you’re not only reducing heat loss but also preventing moisture from entering the roof cavity. This helps to manage airflow effectively and prevents mould growth. Proper airflow management is essential to maintaining a healthy roof. By sealing gaps and joints, you’re ensuring your roof insulation performs as intended, keeping your home warm in winter and cool in summer.
Take your time to inspect and seal all gaps and joints thoroughly to enjoy the full benefits of your roof insulation.
Final Inspection and Testing
- Now that you’ve sealed gaps and joints, it’s time to verify that your roof insulation is working as intended. Conduct a final inspection to ascertain your roof is safe, energy-efficient, and free from defects.
- Begin by reviewing your inspection checklist to confirm you haven’t missed any critical steps.
- Before you start the inspection, take necessary safety precautions to avoid accidents. Wear protective gear, including gloves, safety glasses, and a harness if required.
Check for any signs of damage, wear, or gaps in the insulation material. Verify that all insulation is securely fastened to the roof deck.
Check the following items on your inspection checklist:
- Insulation material is evenly distributed and meets the recommended thickness
- All gaps and joints are sealed
- Insulation isn’t compressed or damaged
- Ventilation is adequate to prevent moisture buildup
If you’ve completed all the steps correctly, your roof insulation should be working efficiently. However, if you find any defects or issues, address them immediately to avoid future problems.
Frequently Asked Questions
Is DIY Roof Insulation Installation Allowed in Local Building Codes?
Before starting a DIY project, you should check local regulations regarding insulation materials to guarantee compliance. Many areas allow homeowners to install insulation, but you'll need to meet specific requirements and possibly obtain permits first.
What Personal Protective Gear Is Necessary for the Installation?
When handling insulation materials, you'll need safety measures like gloves, safety glasses, and a dust mask to protect yourself from cuts, debris, and airborne particles, ensuring a safe working environment for any DIY project.
How to Deal With Exposed Wires and Plumbing?
When dealing with exposed wires and plumbing, you'll want to guarantee your safety first. Turn off the power and water supply, then cover or reroute them to prevent damage or electrical shock.
Are Building Permits Required for Insulation Installations?
You'll likely need a building permit for insulation installations, as they must meet local building codes. Check with your local government to see if permits are required for your specific insulation materials and project.
What to Do if I Have a Sagging Roof During Insulation?
If you have a sagging roof, you'll need to address it before adding insulation materials. Check for damaged or rotten wood and replace it, then add roof support to guarantee a sturdy base for your insulation.
Conclusion
Installing roof insulation is a valuable investment that can significantly improve your home’s energy efficiency and comfort.
By following the steps outlined in this guide – from preparing the roof space to sealing gaps and conducting a final inspection, you can complete this project. Remember to choose the right insulation materials, measure accurately, and pay attention to details like vapour barriers and proper sealing.
A well-insulated roof will help reduce your energy bills, create a more comfortable living environment, and potentially increase your home’s value. If you’re unsure about any aspect of the installation process, don’t hesitate to contact TMR Roof Repairs at 0483-982-422.